Wednesday, July 20, 2016

Removing Popcorn Ceilings in the Whole House!


We were back and forth on removing the popcorn ceilings. We knew that if we wanted to do it, we needed to get it done BEFORE we moved in. We got a quote on getting it done professionally and it was going to cost a couple thousand dollars. We ended up doing this entire project for about $300 including paint and all supplies. Now I would say that if you don't like the idea of sweating and doing very hard, physical work for 2 weeks you might want to hire someone.

I did a lot of research on Pinterest reading multiple blogs about what to do with popcorn ceilings. Some people said they just covered it up, but that was going to cost about the same amount as hiring someone to take it down. I did not find a blog on someone doing this on the entire house. Most people just did one room at a time while they were redecorating. It took them about an hour to scrape 1 room so I thought we would be able to do our entire 2300 sq. ft. house in 2 days. HAHA boy was I wrong.

Step 1: Preparing

Materials:

  • Painters tape ( we only used 1 roll in the entire house)
  • Plastic Sheeting  (We got our's from Home Depot and got the more expensive stuff because it was supposed to "stick" to things. It did stick very well to the wood floors, but not the carpet so lots of tape was still needed)
  • Ladder and drill to remove fixtures.
  • Bag or Tupperware to put all screws for fixtures in!


We closed on the house on a Tuesday afternoon. On our way home from closing, we stopped at Home Depot to pick up some supplies such as plastic sheeting, tape, and a scraper. 

For the next couple of nights we came over and laid the plastic sheeting on the ENTIRE house. We went up over the base boards and taped it to the walls with painters tape. I had seen where you could tape it near the top of the wall, but none of it got on the walls (just water) so I'm glad we decided not to do this. Honestly, most of the tape came off the wall when the ceiling fell on it, but I think it helped enough! 


We were extra careful to overlap the seams and tape them with lots of tape. On the wood floors it wasn't the end of the world if it leaked through, but we didn't want to ruin our new carpet. We were lucky that the flooring was brand new and to our liking when we bought the house, but this project would be SO much easier if you didn't care about saving the floors!

We thought we could do the entire house in 2 nights. I now laugh at our enthusiasm, as it took us like 9 hours to do this. Also, we learned very quickly how to talk things through and be a team. Plastic sheeting is NOT very much fun to spread out. Think plastic food wrap times 100.  We also made a reference or two to the show Dexter and we decided he made it look WAY too easy!

Once my dad came in town Friday night (he had the ladder), he worked on taking down the lights, vents, and ceilings fans while we kept laying plastic sheeting. We really lucked out having my dad on board. He brought so many of his supplies so we saved money on paint supplies and ladders.  ***Make sure you turn the breakers off when messing with the lights. It was dark so we plugged a spotlight into the fridge plug (on it's own breaker) so we could see what we were doing.

Originally (you can see in many of these pictures), we were going to leave the ceiling fans up and just drape plastic over them, but after getting started they were in the way of the guys scraping motion so they all go taken down and put in the garage.

The florescent lights in the kitchen also got taken down. I did not like them and knew that we would be replacing them. It left 4 pretty decent sized holes in the ceiling, but we filled them in before painting.

What the house looked like the morning we started scraping.

Step 2: Scraping the Ceilings

**BEFORE YOU DO ANYTHING, TURN YOUR BREAKERS OFF!!! Water and electricity DO NOT mix!**

This part is very messy and very physically demanding. You need at least 3 people to make this most efficient. Also, if you have 9 foot ceilings like we do, make sure at least 2 people are around 6 feet tall. Otherwise, scraping is even harder! My little 5'3" self could barely even reach the ceiling so I couldn't get the force behind it to scrape without denting the drywall.

Materials:

  • Garden Pump Sprayer (We choose this one because of it's multi nozzle. We knew we would use it for fertilizer/weed killer later on so we wanted more options)
  • Scraper (I read so much about the different options. We choose the actual one made for scraping ceilings because we could attach an extension pole. We also used a plastic paint scraper along the edge where the ceiling met the wall to clean it up)
  • Extension poles (you know the ones you use to paint)
  • Safety Items: Eye glasses and mask for sure. We added cloth booties to keep our shoes clean and hair nets to prevent the nasty to dry in our hair.  Andrew works in a "clean" environment so he snagged these for us from work (Please don't fire him) the week before our project.


~I don't have many pictures of each step because it was wet and gross and I was actually working, but most are self explanatory and if you have any questions, just leave a comment and I'll try to help you out :

  1. Put your safety gear on. You could do this project without all of it, but you have water and the ceiling falling down so a mask and safety glasses are a must. ***Please check to make sure you do not have asbestos before doing this project. Our house was built in 1994 so we knew we were safe***
    We look like nerds, but it was helpful!
  2. Fill up the garden sprayer with water and pump it up to build pressure. I was the one who was spraying the water and I would only fill it up 3/4's of the way. While this means more trips to refill, I could actually hold the water above my head.
  3. You will now spray the ceiling with water. This is the tricky part. You don't want it to be too wet or the drywall will tear, but too dry and it is near impossible to scrape. We found it to be useful to spray an area first and let it sit for about 5 minutes and then respray it right before Andrew or Dad scraped it off. Having this job is frustrating because you are literally holding a sprayer over your head ALL DAY long. My neck and shoulders and back were on fire after doing this for 2 days.
  4. Once you think the ceiling is wet enough, use the scraper to scrape it off in long straight strokes. You want to make sure the blade on the scraper is about 45 degrees to the ceiling and you don't actually want to use too much force/pressure or the drywall will tear. However, if you find it hard to get the texture off, just Both the guys will tell you that it will cut through it like butter, until you get to a joint where there is mud underneath and then you really have to use some force.


  5. This is really dirty and disgusting and looks like wet oatmeal falling to the floor. As the water sprayer, I would make sure that none got on the walls. If you immediately wipe it off then it causes no damage. If it dries, just take a warm wet rag and wipe it off and it should come right off!
  6. The guys went around and together scraped the living room and kitchen. When that was done, they took turns taking breaks and getting up on a ladder to do the edges. They would spray a section near the edge and then take a plastic putty knife to clean up the edges. They would then wipe down the walls and move around the room. They also did around the lights, if it wasn't done with the big scraper.
  7. This took us 2 days (Saturday and Sunday) to do our entire house. We were going to leave all of the plastic sheeting down to use for painting, but it had holes and some of the water leaked through so cleaned it up as soon as possible.
  8. After we had done the whole house, we came around to make sure we hadn't missed any spots and touched it up with the scraper and water bottle.
  9. We forgot this part until after we had cleaned up, but now would be a great time to go around with drywall spackle and fill in all holes in the drywall. After it has dried, you will sand it down and you will have a perfectly smooth ceiling! We really didn't have to do much of this-mostly just where we took out lights.

Step 3: Clean-up

  1. We took the plastic sheeting up when we were done. We just rolled it up onto itself. We then put about 3 rooms into a giant black bag. These bags weighed at least 50 pounds and we could only get 3 in the garbage can with us feeling comfortable that the wheels wouldn't break. We also made some jokes in reference to the show Dexter and how it looked as if we had killed a lot of people (there were 6 bags total). haha
  2. We then spent the entire week cleaning the place up. We had 2 shop-vacs thanks to my parents and Andrew and I went into separate rooms and first swept then vacuumed around EVERY SINGLE BASEBOARD! 
  3. After we had vacuumed the baseboards, I used some of my Mrs. Meyers Multi-surface cleaner and wiped down all the baseboards to get rid of dust.
  4. Our wood floors looked HORRIBLE and it took us damp mopping 3 times to get them back to normal! 

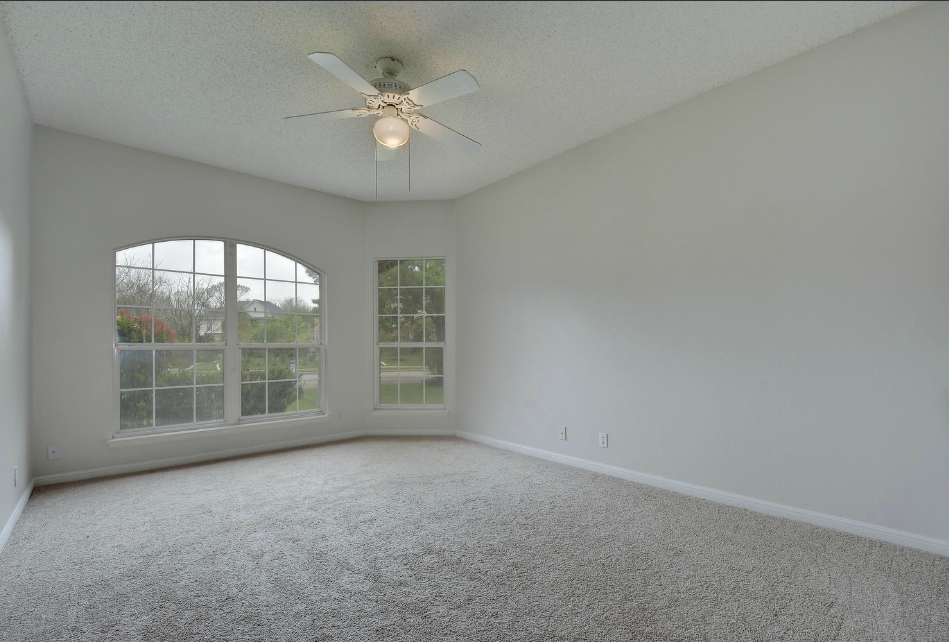
Step 4: Admire all the work you have done!

You will be sore for the entire next week-neck, back, arms, shoulders! You have done a great job and your house already looks better! You will contemplate just leaving the drywall exposed because you can not imagine ANOTHER weekend filled with doing things to your ceiling. All your hard work is going to pay off real soon when you have nice flat ceilings.

Shout-out to my dad, whose birthday is next week! We are so incredibly thankful for all the work you helped us accomplish! We would not have been able to do this without you, at least not all in 1 weekend. Thanks for inspiring me to do things myself and buying Andrew all sorts of power tools so he can help me be crafty! Are you ready to quit your job and scrape ceilings full time?! haha I love you, Dad!


I will share in my next post about how we painted the drywall and show you the finished look! 


Tuesday, July 19, 2016

Gallery Wall {H}

***This post is old and has been sitting in my drafts for about 1.5 years. This was at our rent house and I'm still trying to figure out how to incorporate all our H's in our new house.**


I've been married for 7 months now. I think every girl becomes a bit obsessed with her new last name. I became obsessed with getting any decoration that had an H on it. 

At both of my  bridal showers, they decorated with H's. I was lucky enough to be able to take those with me when it was done! Since then, my mom has given me an H or 2 and I received one as a Christmas gift.


Right after we got married and moved in together, my husband and I were trying to to figure out what to do with all of these H's we had collected. He came up with the awesome idea of hanging them on the wall. Now that we have moved into a real house our collection has grown to cover our giant 15 foot wall over the couch.


Here is our finished "H Wall" that I feel might could be posted on Pinterest to inspire some people. Maybe I'll get a better quality camera first!

My plan is to get some of our wedding pictures printed and framed and put them in the holes between the letters. I also have this giant yellow H that will go up in the top left corner just as soon as I find a way to hang it safely. 

Thanks for reading! 


We bought a house!

This is kind of old news, but Andrew and I bought a house! It is our first house and after nearly 6 years of renting, we are glad to be homeowners!


We are super excited to share with you some of the projects that we will be doing around our house, but first here are some before pictures. This is how the house looked when we bought it.

We both really like the front elevation and especially love the color of the brick. We will eventually redo the landscaping in the front and most likely take out the shrubs and replace them with flowers.


When you walk in, my craft room is on the left and you walk into the formal dining room. We are currently making this into our second living room which really hasn't taken too much work.


This is the craft room which faces the front of the house. I love the windows and floors in here! For my birthday, Andrew bought me some pieces that have helped me organize all of my stuff since there is no closet in here.

If you continue walking straight you will find yourself with this view of our kitchen. Our old kitchen only had 2 drawers, so when we saw the peninsula had 10 alone we got pretty excited! We like the layout of the kitchen and will only replace the back splash, lights, sink, and counters as well as install a built in microwave. A double wall oven would be a dream of mine, but we'll see if it happens in this house!


If you were to go around the kitchen to the right, you would go down a small hall straight into the living room. Some people don't like brick fireplaces, but I think that's the way they should all be! You can also see the breakfast nook to the left of this picture and it's big enough to fit our table of 8 and not feel crowded. The only thing we are doing in these two rooms is decor and paint. We will eventually have to replace some windows that don't stay open.

This is the view from the opposite side of the living room and you can really see how open this part of the house is. I really like that I can be cooking and still see the tv or be apart of the conversation without everyone being crowded in our kitchen.

The view from the breakfast nook. That door way near the center left of the picture leads to the laundry room and master bedroom.

Our bedroom has a great bay window. Maybe we'll build a window seat for it which could double as a dog bed. The dogs love sitting on Andrew's window seat in his room at his parents' house.

Our bathroom is a very nice size! The closet is about the size as our guest room at our rent house! And the toilet has it's own room. We weren't expecting to get all of this out of our bathroom. There is nothing urgent that needs to be done in here, but we will eventually replace the counters since they both have burn marks, update the mirrors, add shelves by the tub, and replace the shower with tile and a new surround.

Guest bedroom #1 has lots of space and the closet is huge! No issues here besides it facing the West and getting real hot in the afternoon.

Guest room #2 which will be used as our workout room and Andrew's office until a little Hohlt comes along.

The hall bathroom was recently updated before we bought the house. We have painted and put our own style into it, but the only thing we will replace is the toilet. I think it is 20 years old and is even short for me!

The backyard! We have 2 pecan trees and 2 oak tress back here as well as this giant deck! This is the type of backyard I have always wanted. The trees provide a lot of shade of the dogs in the heat and once we paint the deck it will be awesome of entertain on (of course it needs to be cooler). Over on the right side is a brick patio where Andrew keeps his grill. We will be creating some raised garden beds and attempting to have a little vegetable garden next year.

Another angle of the backyard. These pictures were taken in early March and you can see the trees aren't very full and green. Right now it looks totally different. I'm not looking forward to all the leaves in our yard come fall, but the dogs love jumping in piles of leaves! The fence doesn't look too hot in this picture, but we thought it would survive until the winter when we could replace it in nice weather. However, when Ava broke a board and almost escaped we tried to nail it back on and found that its all rotted. So our plans to replace the fence will probably come much sooner than expected. We are planning on doing it ourselves after getting quotes that were nearly twice the materials.


I hope you have enjoyed looking at some pictures of our house. We fell in love with the yard, all the windows, and the space that it provided us! We have many projects planned that you can keep up with here. First up is scraping down all 2300 sq. ft. of popcorn ceilings in the house before we can move in! Stay tuned to see how we did this torturous task!


Thursday, February 4, 2016

One Hole Washers Board

We were having a July 4th gathering and Andrew decided that we needed to make a washers board to add to our lawn game collection. We turned to Pinterest to get some ideas on measurements, but we could only find tutorials on 3-hole washer boards and we are NOT into that! I actually learned that it is played different ways in different states, but in Texas is started off with a cup in the ground and you get points for getting the washer in the pit, leaning on the cup, and in the cup. This is how we still play it, but instead of using a sand pit we play on a board.

We used the advice of my awesome Uncle Donny who has made washers boards and cornhole boards as well as random tips we found on the internet.


Materials:

Plywood 2'x4'
Outdoor Carpet (Optional)
2- 2'x4'x8'
wood screws/nails (We ended up using 32 total)
8 washers 2.5" Outer Diameter (1" inner diameter)
Spray paint
Tacky Glue (Or any craft glue on hand)
jig saw, circular saw, drill
Exacto knife/box cutter/pocket knife


1. Cut Plywood in half to make 2-2'x2' squares using the circular saw.


2. Cut the 2x4's to have 4 pieces be 24" long and 4 pieces be 21" long.


3. Take a 24" and 21" piece and set them perpendicular to each other. Use your square to make sure they are actually square. Pre-drill and then screw 2 wood screws to attach the pieces. Repeat this to each corner to make a square.


4. Place the plywood on top of your square frame. Line them up and them pre-drill 2 holes on one side. Screw in the wood screws. Now pre-drill the other 3 sides with 2 holes each. Screw in wood screws. You should have a total of 8 screws on top.

5. Go through your entire kitchen and try to find a circular object that is 3.5" diameter. Trace it in the center of the board and use a jig saw to cut out the center. (We do not own one yet so this part took forever and our circle looks pretty horrible. But as my dad said, "The washers won't care!", so neither do we!


6. Spray paint the base with your desired color. You can seal it if you so desire.

7. While you have the spray paint out, paint your washers two different colors. We did maroon and white to continue with the Texas A&M theme.

8. After the spray paint has dried,  lay outdoor carpet right side down on the ground.


9. Use Tacky Glue (or any kind of glue you have on hand) to coat the top of the boards.


10. Set the boards on the carpet with the glue side down and dry for a couple of minutes. Now use your knife to cut out the carpet. Place the boards-carpet side down- and let the glue dry overnight.  You can put heavy objects to apply pressure but we did not do this and the glue dried perfectly!


11. After the glue has dried cut the circle out of your carpet.

12. Play washers!


***UPDATE: We have had these boards for 6 months now and they have seen a lot of play. They still look nice and the turf is holding up great! Only con is that they are quite heavy. I'm sure you could use lighter wood. We also added handles to the sides to make them easier to carry. We took them to the beach and found that wasn't the best idea as the washers disappear in the sand easily.***

Here are the rules we play with:


Friday, January 15, 2016

Check out my teacher blog!

I've been very busy with my job as an Algebra 1 Teacher so I haven't been doing many projects.
I have started keeping up with my teacher blog though. So if you're interested in reading about teacher stuff, Algebra 1 stuff, or just random school stuff check it out!


Monday, June 29, 2015

Classroom Set-up 2014-2015

When I started blogging, I was only doing teaching blogs. I soon had a problem that I was doing all of these DIY projects that I wanted to share with the world (even if no one actually reads these), but those posts didn't quite fit into my other blog so I just quit writing all together. Today, in honor of me getting a new job and planning how I want to set up my new class, I am re-posting a post I shared on my other blog.

~~~~~~~~~~~~~~~~~~~~~~~~~~~~~~~~~~~~~~~~~~~~~~~~~~~~~~~~~~~~~~~~~~~~~~~~
So in the 3 years I have been teaching, I have now had 3 different classrooms. I've gotten good at the moving thing. It also helps cut down on letting things accumulate as I either have to move it or trash it.

I have been blessed with unusually large classrooms for the last two years and while last year it was a struggle getting my students to stay on the correct side, this year most of my students are on the computers all period so it's not so bad.

I know I always go searching for ideas of classroom layouts and decorations so I thought I would share what I've done in this new classroom.


View from my desk of my classroom.


I made the pennant banner over the summer with some leftover fabric I've had for years. It took forever to make but definitely adds a little touch of "home" to my classroom.


I have 3 doors to my classroom. The building used to be a hospital and when they took out walls to patient rooms to make our classrooms they didn't take out the doors. So having extra doors to the class are a temptation to my students so I've had to block the 2 we don't use. This one became my student information center. I have the class rules posted, the lunch menu, throughout the year this is where I post flyers about things happening in school. Our doors are made of wood so I just staple all of these things up. On the table I have white boards, markers, pencils, and pens. As well as one of the pencil sharpeners and some scratch paper and formula charts in the trays.


I laminated some of the things my students have given my throughout the year and put others on this maroon bulletin board my mom made me. My husband made me that wonderful name plate for Christmas. I am amazed by his talents! My students also can't believe he actually made it, they think he lied to me and bought it off the internet. Haha!


As you can see the pennant banner goes all the way down the length of the room. This is the area behind my desk. I was lucky enough to have this metal closet as well as a coat closet in my new room! My storage nightmare from last year was fixed! I got the posters here from Sarah at Math Equals Love. (If you haven't read her blog you should! There are a lot of good things on it!)


This is my supply bookshelf. All the markers, scissors, glue, and textbooks can be found here. We don't use them as much this year as last but the students know where to go to get supplies. I also posted the 4 questions from Capturing Kids Hearts.


My desk area. I use the table to have small group pull out sessions during my computer class. On the other side of my desk is the table with 5 crates where my students leave their notebooks and folders. If they take them home, they'll be left on the bus, forgotten, taken to the park and left, so on and so forth. Since our school doesn't allow backpacks for safety reasons, we find it easier just to have the students store their work in class.


I have 15 computers in my classroom. Some may think this as a blessing, but the majority of our curriculum is online for credit recovery. However, I have more than 15 students scheduled in most classes and on any given day I might have 1-3 computers not working properly. I also only "direct teach" 1 block of true freshmen who have never been in high school but age wise are still behind (most of them were held back at some point in their school career and were too old to repeat 8th grade). 


Here are some problem solving strategies that I got from Sarah as well. 

I have 3 whiteboards in my giant classroom, but I only have power on two walls which happens to be the two that 2 of the whiteboards are on. That being said, I have to block my whiteboards with computers. I'm not losing much because the teacher before me had used them as bulletin boards so there is tape residue all over them making them impossible to write on anyways. I have turned this whiteboard into my word wall. I typed up and printed all the words that were common to Algebra, Math Models, and Geometry and will review one each day in each class and then put it on the board.

The little blue square is my graduate board. When a student finishes all of their classwork and are test complete they will get a special star on the graduate board. It's pretty common for Math Models to be their last class they need to graduate so my hope is that this will motivate others to finish and graduate as well!


My awesome magnetic graph board! I put my objectives up there and teach off of here. 


I used the calendar numbers from the teacher store and stapled them to a shoe caddy to make my calculator station. I have since assigned each student a number and they take their calculator when they enter class and we don't leave until each one is put away. I have also started storing a pencil in each pocket. This seems to have the least pencils go missing. I might only have to refill 5 a week now instead of like 20 a week.


During PD before school started, the principals told us we had to keep our doors locked and closed at all times so I put these posters on the back. Each time a student opens the door, my hope it that they'll think of something positive.I also took this from Sarah. Each week we go over how we can take one of these negative thoughts (in gray) and think more positively (the corresponding poster in color). 


Having the schedule in a pocket chart is helpful because on Wednesday's we have a different schedule to include a 20 minute Activity Period between 4th and 5th. I have a student just switch out the times 1st period on Wednesday.

This is the view of my class from the door. As you can see I have 4 circle tables that I used for my direct instruction time, but they didn't end up lasting long. It was really hard to keep already really unmotivated and distracted kids on task when they could easily look at each other and be readily tempted to talk to each other. I found a teacher who had too many desks in her classroom and traded out by tables for desks.

The outside of my classroom door.


The outside of one of my other 2 doors. I liked this quote because many times my students have bad days and I wanted them to realize that everyday is a new day...no matter what!!

This has since been written on and ripped down by some students passing in the hall :(

Our students get course completions with every half credit they finish and so when this happens I write their name on a star and staple it on this board in the hall. It is November and I have 8 stars now, some with more than 1 course.


We are required to post our class schedule outside our rooms. I decided to print them big and make a bulletin board out of it. I bought a twin size flat sheet at Walmart for like $4.50, folded it in half, and stapled it on the wall. It's at eye level up to the ceiling and surprisingly the border and  hasn't been torn down!


This isn't my creation but one of my fellow math teachers decorated the outside of one of her doors. Her and her friend actually wrote this out by hand!


Thanks for reading!

~~~~~~~~~~~~~~~~~~~~~~~~~~~~~~~~~~~~~~~~~~~~~~~~~~~~~~~~~~~~~~~~~~~~~~~~~~~~~~~~~
I hope you found this post inspiring in decorating your high school classroom. As you can see, I use bright colors and my students don't seem to mind it! 

Check back for updates on my new classroom!

~Lauren